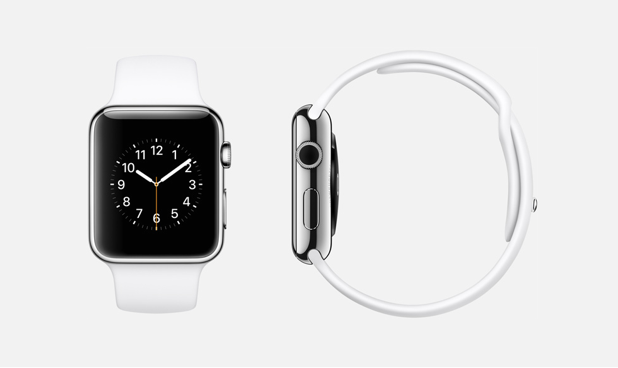
A page-based interface in an app is useful for displaying non-hierarchical content. If your iOS app includes a page-based interface, it makes sense to use the same interface in your Apple Watch app. Read on to find out how to do it in Xcode.
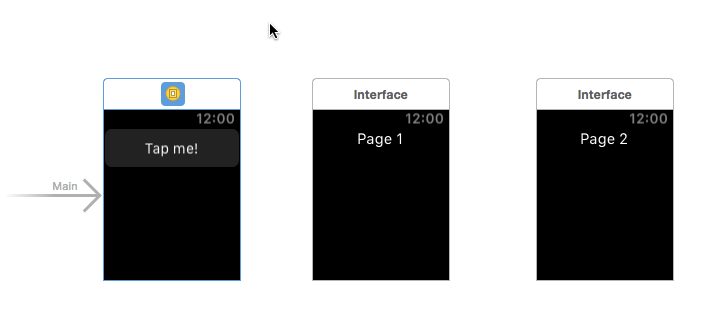
For demonstration purposes, a simple WatchKit app with three interface controllers will be used. One is the initial view, and the two others are modal screens that are presented in page-based style. Before you follow the tutorial, make sure you have created a new Xcode project and added the WatchKit target.
In this tutorial, we are going to create the navigation from the storyboard.
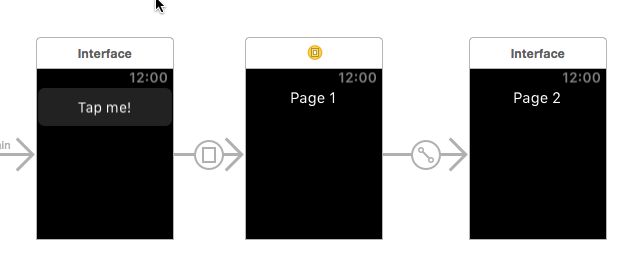
1. Go to the Interface.storyboard file under the WatchKit App folder, and add two more interface controllers to the storyboard. For the first one, add a button to the view. The second and third view contains a simple label showing the page index.
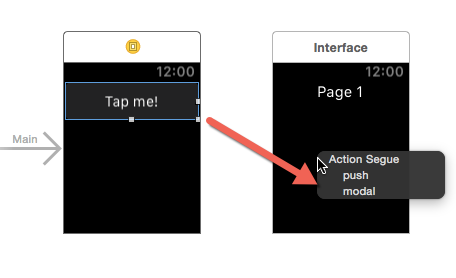
2. Control-drag from the button in the first view controller to the second view, and choose the modal option from the Action Segue menu. You have to set it as the modal segue since the page-based navigation does not work with a push segue.
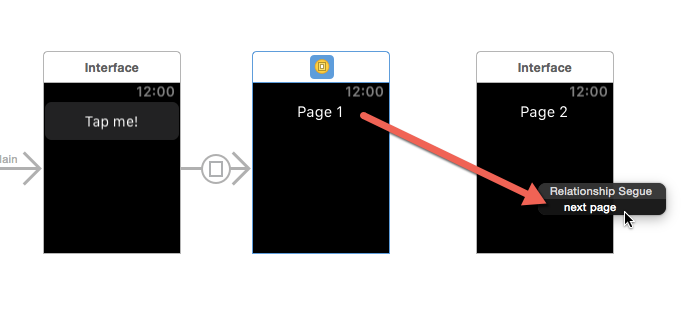
3. Control-drag from the second view to the third view, and choose next page in the Relationship Segue menu.
4. That is all you have to do in order to have a working page-based navigation in your app. Your storyboard now looks like this. Notice the newly added segue indicators between the views.
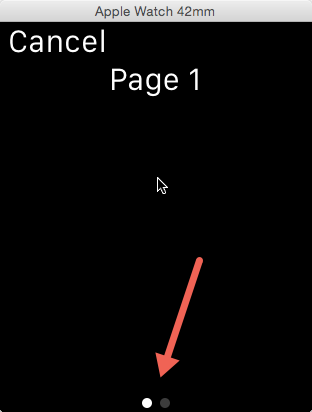
5. Run the app, and then tap the button to bring up the first modal screen. As you can see, there is a page indicator at the bottom of the screen. If you swipe to the left, you will see the second screen.
6. Repeat Step 3 to add more pages to the screen. In the next tutorial, we are going to learn how to do the same thing from code.

