Because of busy schedules and daily distractions, forgetting to send important text messages is a common problem for many people. While you can create notes to remind you, scheduling a message is a better option. Using scheduled text messages, you no longer have to rely solely on your memory to send them, and you can be sure that your messages reach your contacts at the right time. This tutorial shows you how to set scheduled messages on Samsung Android phones.
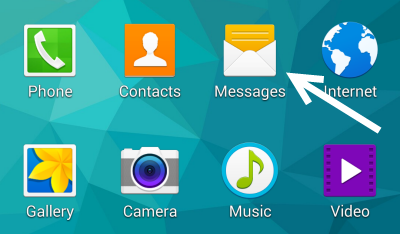
1. Open the app drawer, and choose the default Messages app.
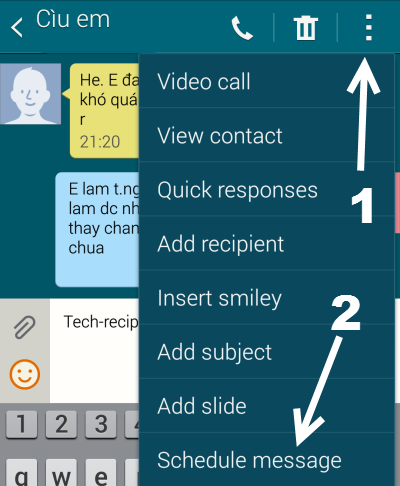
2. Next, go to the message thread of the person to whom you want to send the scheduled message, tap the over-flow menu icon, and then choose Schedule message. If this thread does not exist, you can create a new message thread, and access the Schedule message feature without any problems.
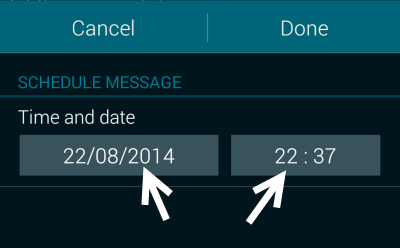
3. By tapping on the time and date buttons, you can set the time when you want the message to be sent. The target time must be more than six minutes before the current time. When you have set the time, tap Done to save the time and return to the previous screen.
4. Now, you can compose the message, and then hit the Send button. You may notice that there is a clock next to the envelope which indicates that the written message is scheduled to be sent in the future.


5. If you change your mind and want to send the message immediately or cancel it, you can do so from the menu which pops up when you long-tap on the message.

6. In case you have set multiple scheduled messages, you can manage them all in the Scheduled messages section. Please note that the section can only be accessed from the main interface of the Messages app.
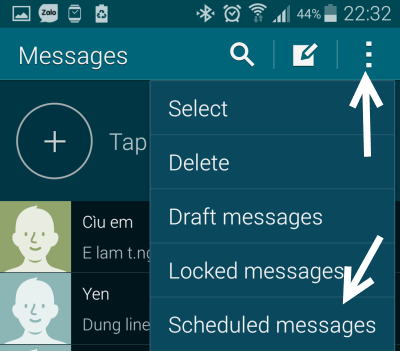
7. In this section, you can send or delete scheduled messages in bulk. All you have to do is select the desired messages and tap send or delete.


