Whenever you paste a graphic file to your Word document, the picture will be placed inline with the text. Most users will find this is not the result that they want, so manually adjusting the image position is needed. Luckily, it is possible to change the default paste behavior so that the pasted image will be positioned as expected automatically.
When I insert a picture into a document, I often position it in a new line, separate from the text. Manually adjusting the position of the picture is a pain if there are a lot of pictures in the document. Using the steps below, the pasted image will be taken care of automatically.
1. Launch Word 2013.
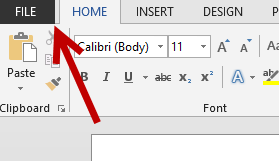
2. When the editor is fully loaded, click the File button to open the Backstage view.
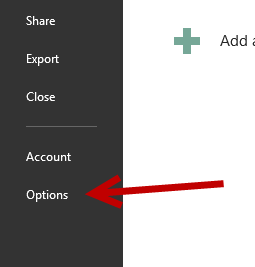
3. In the Backstage view, choose Options to open the settings window of the program.
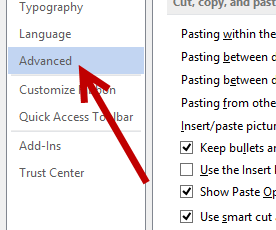
4. A new Options window pops up on screen. Choose the Advanced section on the left side to continue.
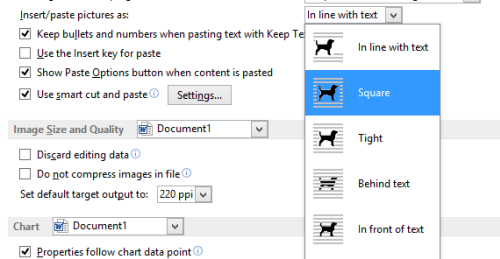
5. On the right side of the window, scroll down to the Insert/paste pictures as option. Click on the option box in the same line to change the option. By default, it is set to In line with text. You can, however, change it to one of the following options:
– Square: the surrounding text will be wrapped around a square bounding box.
– Tight: Text will be wrapped around the shape of the graphic.
– Behind text: The graphic will be placed on its own layer, under the text.
– In front of text: The graphic will be placed on its own layer, in front of the text. Text under the graphic cannot be seen.
6. Once you have set the desired pasting option, click the Save button at the bottom of the window to preserve the changes.
7. If the paste behavior is not exactly what you want, you can always come back to Options -> Advanced -> Insert/paste pictures as to change it.

