Maven is a powerful tool that allows users to import dependencies into their software projects and also automatically manage transitive dependencies. In order to use Maven, it is necessary to explicitly add dependencies to the Maven pom.xml file. Once added to the Maven pom.xml file, dependencies will be automatically downloaded, updated, and have their sub-dependencies managed by Maven.
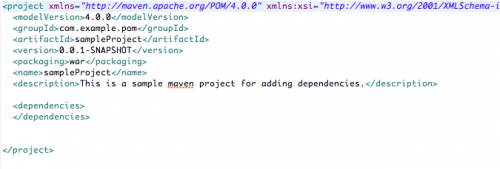
1.Creating a blank pom.xml file is possible using Eclipse. Using an empty pom.xml as a template, we will need to add tags in the pom.xml file. The dependencies our project requires will be added between these tags.

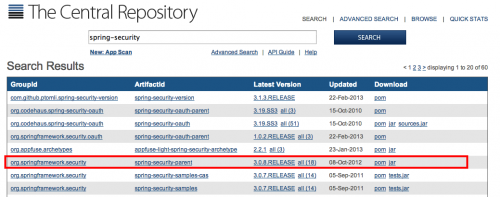
2.There are multiple search engines for Maven dependencies online. One of the more popular search engines is http://search.maven.org/. Navigate to this page, and search for a necessary dependency for your project. In this tutorial, we will use “spring-security” dependency as an example. Enter the information, and click Search.

3.A list of search results will appear. Some results will be more relevant than others. Choose the most relevant result that correlates with the dependency you need for your project. For this tutorial, I will choose the result with ArtifactId spring-security-parent. Click the Latest Version link for the desired dependency.

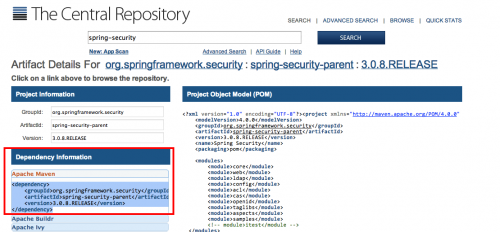
4.The POM information for the dependency will be displayed on the screen. You may view this information carefully to determine whether or not the dependency is the one necessary for your project. If it is, copy the text in the Dependency Information > Apache Maven section to the clipboard. We will use this text in our pom.xml file.

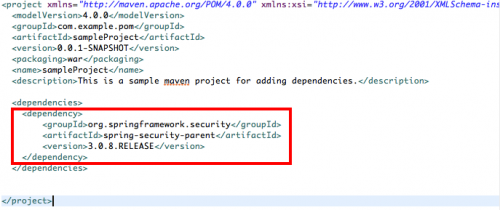
5.Paste the copied information from Step 4 between the tags created in Step 1. Save your pom.xml file.

Now, during the next build of your project, the dependency will be added as part of the build. If you are using Eclipse, you can automatically see this dependency in the Dependencies tab in the pom.xml editor.


