This tech-recipe will include a batch file that lets you mount and unmount .WIM files in Windows 7 Professional / Ultimate and Windows Server 2008. I will also explain some the basics of WIM files and discuss how to manage them using DISM from the command prompt.
Introduction to WIM files:
Windows Imaging Format (WIM) files are used by Microsoft and imaging / deployment solutions. Microsoft has changed their imaging solution from a sector copying to file copying solution. WIM files are basically just a more complex zip type file: they contain a basic file structure and in turn one can mount them using the DISM.exe command from the command prompt or with a 7-zip. WIM files are created by the ImageX application that is part of the Microsoft Windows AIK (ie WAIK Toolkit). This is why we need to install the WAIK toolkit, mainly just to get the imagex.exe utility.

One can mount a WIM file and in turn make changes to the mounted directory and then commit the changes back to the WIM file. This is very useful for making registry edits or changes to your WIM images or when deploying computers.
My DISM Tool:
We use use DISM.exe to manipulate WIM files.
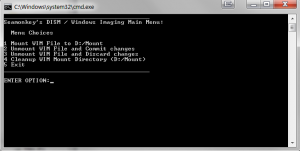
Today, I’ve included a quick batch file that will present you with a basic DOS-type GUI that will let you mount a wim, unmount and commit changes, unmount and discard and clean up your mount directories.
The batch file will look to a specified folder where your WIM files reside and generate a list of them and their index.
Things to Change/Download:
– Download My Batch File (download here)
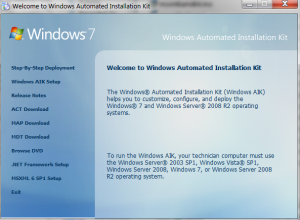
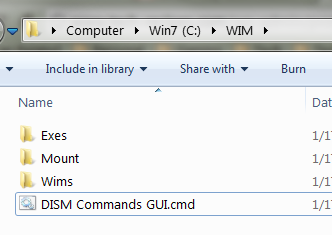
– ImageX application (actual imagex.exe), it is part of the WAIK Toolkit (Download here from Microsoft). You will need to install the WAIK Toolkit and the go to C:\Program Files\Windows AIK\Tools\x86 and copy the imagex.exe file somewhere easy to find. (in my example, C:\WIM\exes\imagex.exe)
– Update the SET variables in the batch file to how your setup. The default I have setup is the following:
set imagepath=C:\WIM\Wims (location where your wim image files are)
set exepath=C:\WIM\Exes (put imagex.exe in here!)
set mountpath=C:\WIM\Mount (temp folder that is used when wims are mounted)

– Run the batch file and use the menu!
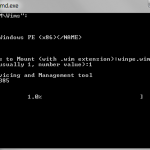
Option 1. This lists all WIM files in the wimpath location and also uses Imagex.exe to find list the WIM info so you can see how many Indexes there are (if more than one) and will also mount the WIM file to your Mount directory.
Option 2. This will unmount the WIM file and commit any changes made to the Mount directory back into the WIM file and also clears the Mount directory.
Option 3. This will unmount the WIM file and discard any changes made to the Mount directory and clear the Mount directory.
Option 4. This will just cleanup the Mount directory if there are any orphaned files or directories.
Option 5. Exits the batch file.
Props to nomer on the findstr piece!


